I've wrapped up the build of the Tamiya GT-R kit. By the time I was finishing up this kit, I was remembering why is was that I tried a wooden kit in the first place. I get worn out on all the painting, the frustrations of various paint types not agreeing with one another, and the fragility of decals. Although at least with this project, I took away a few valuable lessons that I can keep in mind for future similar projects. Here are a few tidbits to remember:
- If it is going to be shiny, use lacquer. Tamiya's gloss acrylics just never behave when airbrushed.
- Don't use the microSOL (aka Decal Melter) until the decal is in it's final place and already partly dry.
- If some of it will be painted over, remove the underlying chrome plating first, otherwise, the paint will just chip off, despite using primer.
- Give the aforementioned lacquer PLENTY of time to dry before putting masking tape on it. Probably should wait 24 hours before trying.
- One should probably order a second set of decals for a project like this, as some are sure to be damaged. Alternately, perhaps one could scan them, and buy a self-print decal sheet so one could make replacements (although I'm not sure about the quality difference here)
- Third party racing harness kits, while pretty cool, might not be worth the effort unless the car is an open wheel type.
Anyhow, with this project completed, I spent a few minutes photographing but this car and the last project (WWII BMW r75 motorcycle). I recently purchased a new lens, which has some macro capabilities, and tried that out on this shoot. I am pretty pleased with the results. Here are a few images of the completed models:
The full galleries are online and can be reached by either following the links on the right sidebar (new feature!) or by clicking the links below:
http://www.hello-napalm.com/photo_cols/bmwr75/
http://www.hello-napalm.com/photo_cols/calsonicgtr/
Also, as you may recall, at the beginning of this project, I set up a web cam that would allow me to both stream images to a web page, as well as do a bit of a timelapse thing of the entire build. As a result of that, I've collected the images, put them together and made a fancy little video. Check it out (click on the link under the video to see the larger version):
Tamiya Build Time Lapse from Nathan Fariss on Vimeo.
Next up: Model Airways' Curtis 'Jenny' wooden plane. Stay tuned for more model adventures!
This is my blog about model-related stuff that I do. This may be plastic or wooden modeling, depending on my current project.
Currently working on: Model Airways Curtiss Jenny
Showing posts with label Tamiya. Show all posts
Sunday, August 8, 2010
Monday, July 5, 2010
Model Desk Renovation & Tamiya GT-R
Since the last post, I've done a few things to make my workspace a bit better.
First I built myself a little shelf, so that I could have better access to my various paints, glues and other toxic chemicals. I just picked up a small sheet of thin plywood at Home Depot as well as some little 1"x1"x12" blocks of pine. I worked up some quick plans, drew them out onto the plywood, busted out the jigsaw and started cutting. After some gluing, drilling, a few wood screws, and a couple coats of gray spray paint, I now have a nice little shelf for my desk (you can also see here the monitor for the cam/computer setup I mentioned in the previous post):
Next, after knocking over my bottle of high-power plastic cement, and melting all the lines off the middle of my cutting mat, I thought it might be a good idea to make sure that doesn't happen again. Especially since this was not the first time I had knocked this same bottle over. After rummaging around a bit, I found some nice wood I had left over from the base I made for the Panzer project (red oak, I think). I cut a couple squares of this, glued them together, and then, using a hole saw, drilled a hole just a bit bigger than the glue bottle. A couple coats of polyurethane, and now I've got a little block that keeps my glue bottle from falling over and doesn't look too terrible.
Before I jumped into another long-term wooden project, I decided to make one more plastic kit. I settled on the Tamiya Calsonic Impul GT-R kit that I bought a while back, thinking it would be fairly quick and easy, since it doesn't have an engine and only a rudimentary interior. I had intended to build it straight from the box, but I couldn't resist adding an third party racing harness kit. Here you can see the completed interior, as well as the mostly-built exterior shell:
I should wrap this project up in the next few weeks, and then I'll get some proper photographs of both this completed model and the motorcycle model that I finished before this one. Stay tuned!
First I built myself a little shelf, so that I could have better access to my various paints, glues and other toxic chemicals. I just picked up a small sheet of thin plywood at Home Depot as well as some little 1"x1"x12" blocks of pine. I worked up some quick plans, drew them out onto the plywood, busted out the jigsaw and started cutting. After some gluing, drilling, a few wood screws, and a couple coats of gray spray paint, I now have a nice little shelf for my desk (you can also see here the monitor for the cam/computer setup I mentioned in the previous post):
Next, after knocking over my bottle of high-power plastic cement, and melting all the lines off the middle of my cutting mat, I thought it might be a good idea to make sure that doesn't happen again. Especially since this was not the first time I had knocked this same bottle over. After rummaging around a bit, I found some nice wood I had left over from the base I made for the Panzer project (red oak, I think). I cut a couple squares of this, glued them together, and then, using a hole saw, drilled a hole just a bit bigger than the glue bottle. A couple coats of polyurethane, and now I've got a little block that keeps my glue bottle from falling over and doesn't look too terrible.
Before I jumped into another long-term wooden project, I decided to make one more plastic kit. I settled on the Tamiya Calsonic Impul GT-R kit that I bought a while back, thinking it would be fairly quick and easy, since it doesn't have an engine and only a rudimentary interior. I had intended to build it straight from the box, but I couldn't resist adding an third party racing harness kit. Here you can see the completed interior, as well as the mostly-built exterior shell:
I should wrap this project up in the next few weeks, and then I'll get some proper photographs of both this completed model and the motorcycle model that I finished before this one. Stay tuned!
Saturday, June 19, 2010
A Sneak Preview
Just a quick post to bring things up to date. Here's a quick look at upcoming projects.
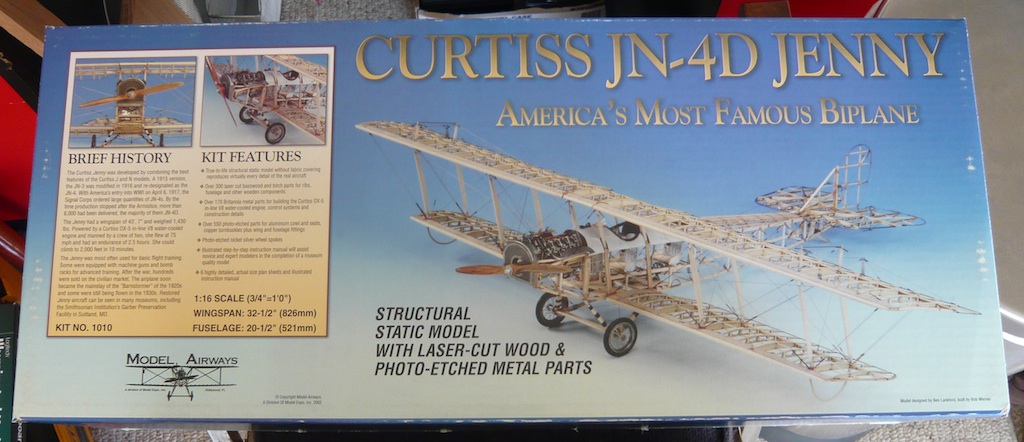
This past week I received a kit for another wooden and metal model. This one is a WWI biplane, the Curtiss JN-4D 'Jenny'. I'm hoping that it'll be a challenging build, similar to the Sloop build, except with much more metal and photo-etch. I'm actually hoping to set up a time-lapse recording method for this build, using an old computer, and a webcam. But since I think this might take me a little bit to get set up and tested, I'm going to hold off on starting this build for a little while.


So, in the meantime, after wrapping up the motorcycle model (which I plan on doing today), I'll be putting this one together:

It should be a quick, fun build, since there isn't any engine. I was in the mood to make something shiny before I start on a longer build, so I figure I can crank through this one in a few weeks, and should be able to test out my timelapse setup in the process :)
And there we have it. That's my modeling progress brought up to date. Party on.
This past week I received a kit for another wooden and metal model. This one is a WWI biplane, the Curtiss JN-4D 'Jenny'. I'm hoping that it'll be a challenging build, similar to the Sloop build, except with much more metal and photo-etch. I'm actually hoping to set up a time-lapse recording method for this build, using an old computer, and a webcam. But since I think this might take me a little bit to get set up and tested, I'm going to hold off on starting this build for a little while.


So, in the meantime, after wrapping up the motorcycle model (which I plan on doing today), I'll be putting this one together:

It should be a quick, fun build, since there isn't any engine. I was in the mood to make something shiny before I start on a longer build, so I figure I can crank through this one in a few weeks, and should be able to test out my timelapse setup in the process :)
And there we have it. That's my modeling progress brought up to date. Party on.
Subscribe to:
Posts (Atom)